Measuring for window repair and replacement is relatively simple. Still, any errors can lead to purchasing windows that won’t fit your home properly. To make the process of purchasing the right windows for your home easier, here is our comprehensive guide to measuring windows!
What to Keep in Mind When Measuring
Before you start to measure your windows, let’s explore a few things you should consider.
Exclude Trim
As you measure, your measurements should not include the trim, as this isn’t actually a part of the replacement window.
Local Weather Patterns
If extreme weather or temperatures occur when you measure, this may cause your windows to expand or contract and influence the accuracy of your measurements. This is especially true of older windows that aren’t energy efficient.
Types of Windows
Although the majority of windows are symmetrical and even rectangular in shape, some will require additional measurements. If you have a custom architectural window, an arched window, or a bay or bow window, expect to make extra measurements to account for different panel sizes and shapes.
Parts of a Window
Since we will be using a lot of window jargon throughout the window measuring steps, here’s a quick dictionary of the parts of a window:
- The head (or header) is the topmost part of a window that runs across the top ends of the jambs. The top edge of the window sash rests against the head when fully opened for vertically opening windows.
- Jambs are the sides of the window that hold the sashes in place on either side.
- Sashes are the moveable parts of the window, comprised of the glass and the frame.
- The sill is the bottom part of a window that runs across the base of the jambs. This is where the sash rests when a vertically opening window is closed, not the decorative piece of trim at the base of the window (the window stool).
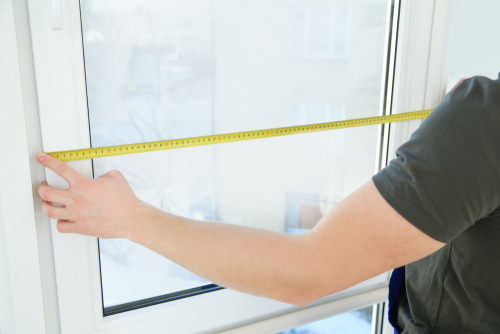
Measuring for Window Repair and Replacement
Ultimately you will be taking four measurements for standard windows: width and height. Here are the basic steps:
Measurement #1: Window Width
- Expose the jamb by opening the window.
- Measure from left inside the jamb to right inside the jamb along the bottom of the window.
- Close the window.
- Measure horizontally from left to right jamb along the middle of the window.
- Measure horizontally from left to right jamb along the top of the window.
- The smallest measurement recorded is the window width.
Measurement #2: Window Height
- Measure from the sill to the head along the left jamb.
- Measure from the sill to the head up the center of the window.
- Measure from the sill to the head along the right jamb.
- The shortest measurement recorded is the window height.
Measurement #3: Window Depth
- Measure the jamb depth by extending your measuring tape from the inside of the interior stop to the inside of the exterior stop.
- Ignore pulleys or parting strips when measuring for depth.
- Record the measurement. You’ll need at least three and a half inches of depth for most replacement windows, with the ideal depth being around four to four and a half inches.
Measurement #4: Check for Square
- Measure from the top left corner, where the head and jamb meet, diagonally across the window to the bottom right corner, where the other jamb meets the sill.
- Measure from the top right corner diagonally across the window to the bottom left corner.
- Compare the measurements. They should differ by no more than a quarter of an inch.
- If the measurements aren’t a close enough match, you’ll need to record an adjusted width measurement. Use a level to check your window and note the distance you have to move the level for it to balance out. Add this number to the smallest width measurement for your adjusted width.
This process will work for measuring double-hung, single-hung, sliding, casement, and awning windows — all of which have a symmetrical shape that can be recorded with simple width and height measurements. Because not all windows are perfectly symmetrical, here are more detailed guides for measuring other types of windows.
Measuring Bay and Bow Windows
Bay and bow windows are essentially comprised of separate standard window panels, making measuring them less complicated than you might think. The most important part is to measure each individual window that comprises your bay and bow windows, taking extra care to measure windows of differing widths. All panels should be equal in height, and typically, only the center window will have a larger width than the side panels. Be sure to record these different widths separately.
Measuring Arched Windows
If your window has an arched panel at the top, you’ll need to follow these steps to measure the arch after measuring the standard-sized panels:
- Measure the width from one side to the other along the base of the arched window (inside the trim).
- Measure the height at the center to record the tallest point of the arch.
- A perfect arch should have a height exactly half the width. If you do not have a perfect arch, you should have a professional window installation company help you with the measuring and installation process.
Leave Measuring Windows for Repair or Replacement to the Professionals!
Rather than ordering replacements online, it’s always better to have a professional come and measure on your behalf. Purchasing custom replacement windows from a reliable company that takes care of the measuring will guarantee a perfect fit because the installer is responsible for any discrepancies in the measurements resulting in an ill-fitting window.
If you’re looking for beautiful replacement windows that exactly fit your home’s needs, contact Rolox for a consultant to give you a quote.